Category: Mobile

Android and iPhone tutorials which can help you use your mobile phone more easily. Find out what amazing things you can do with your smartphone.

  • How to Spot a Fake Micro SD Card Before Buying One?

    How to Spot a Fake Micro SD Card Before Buying One?

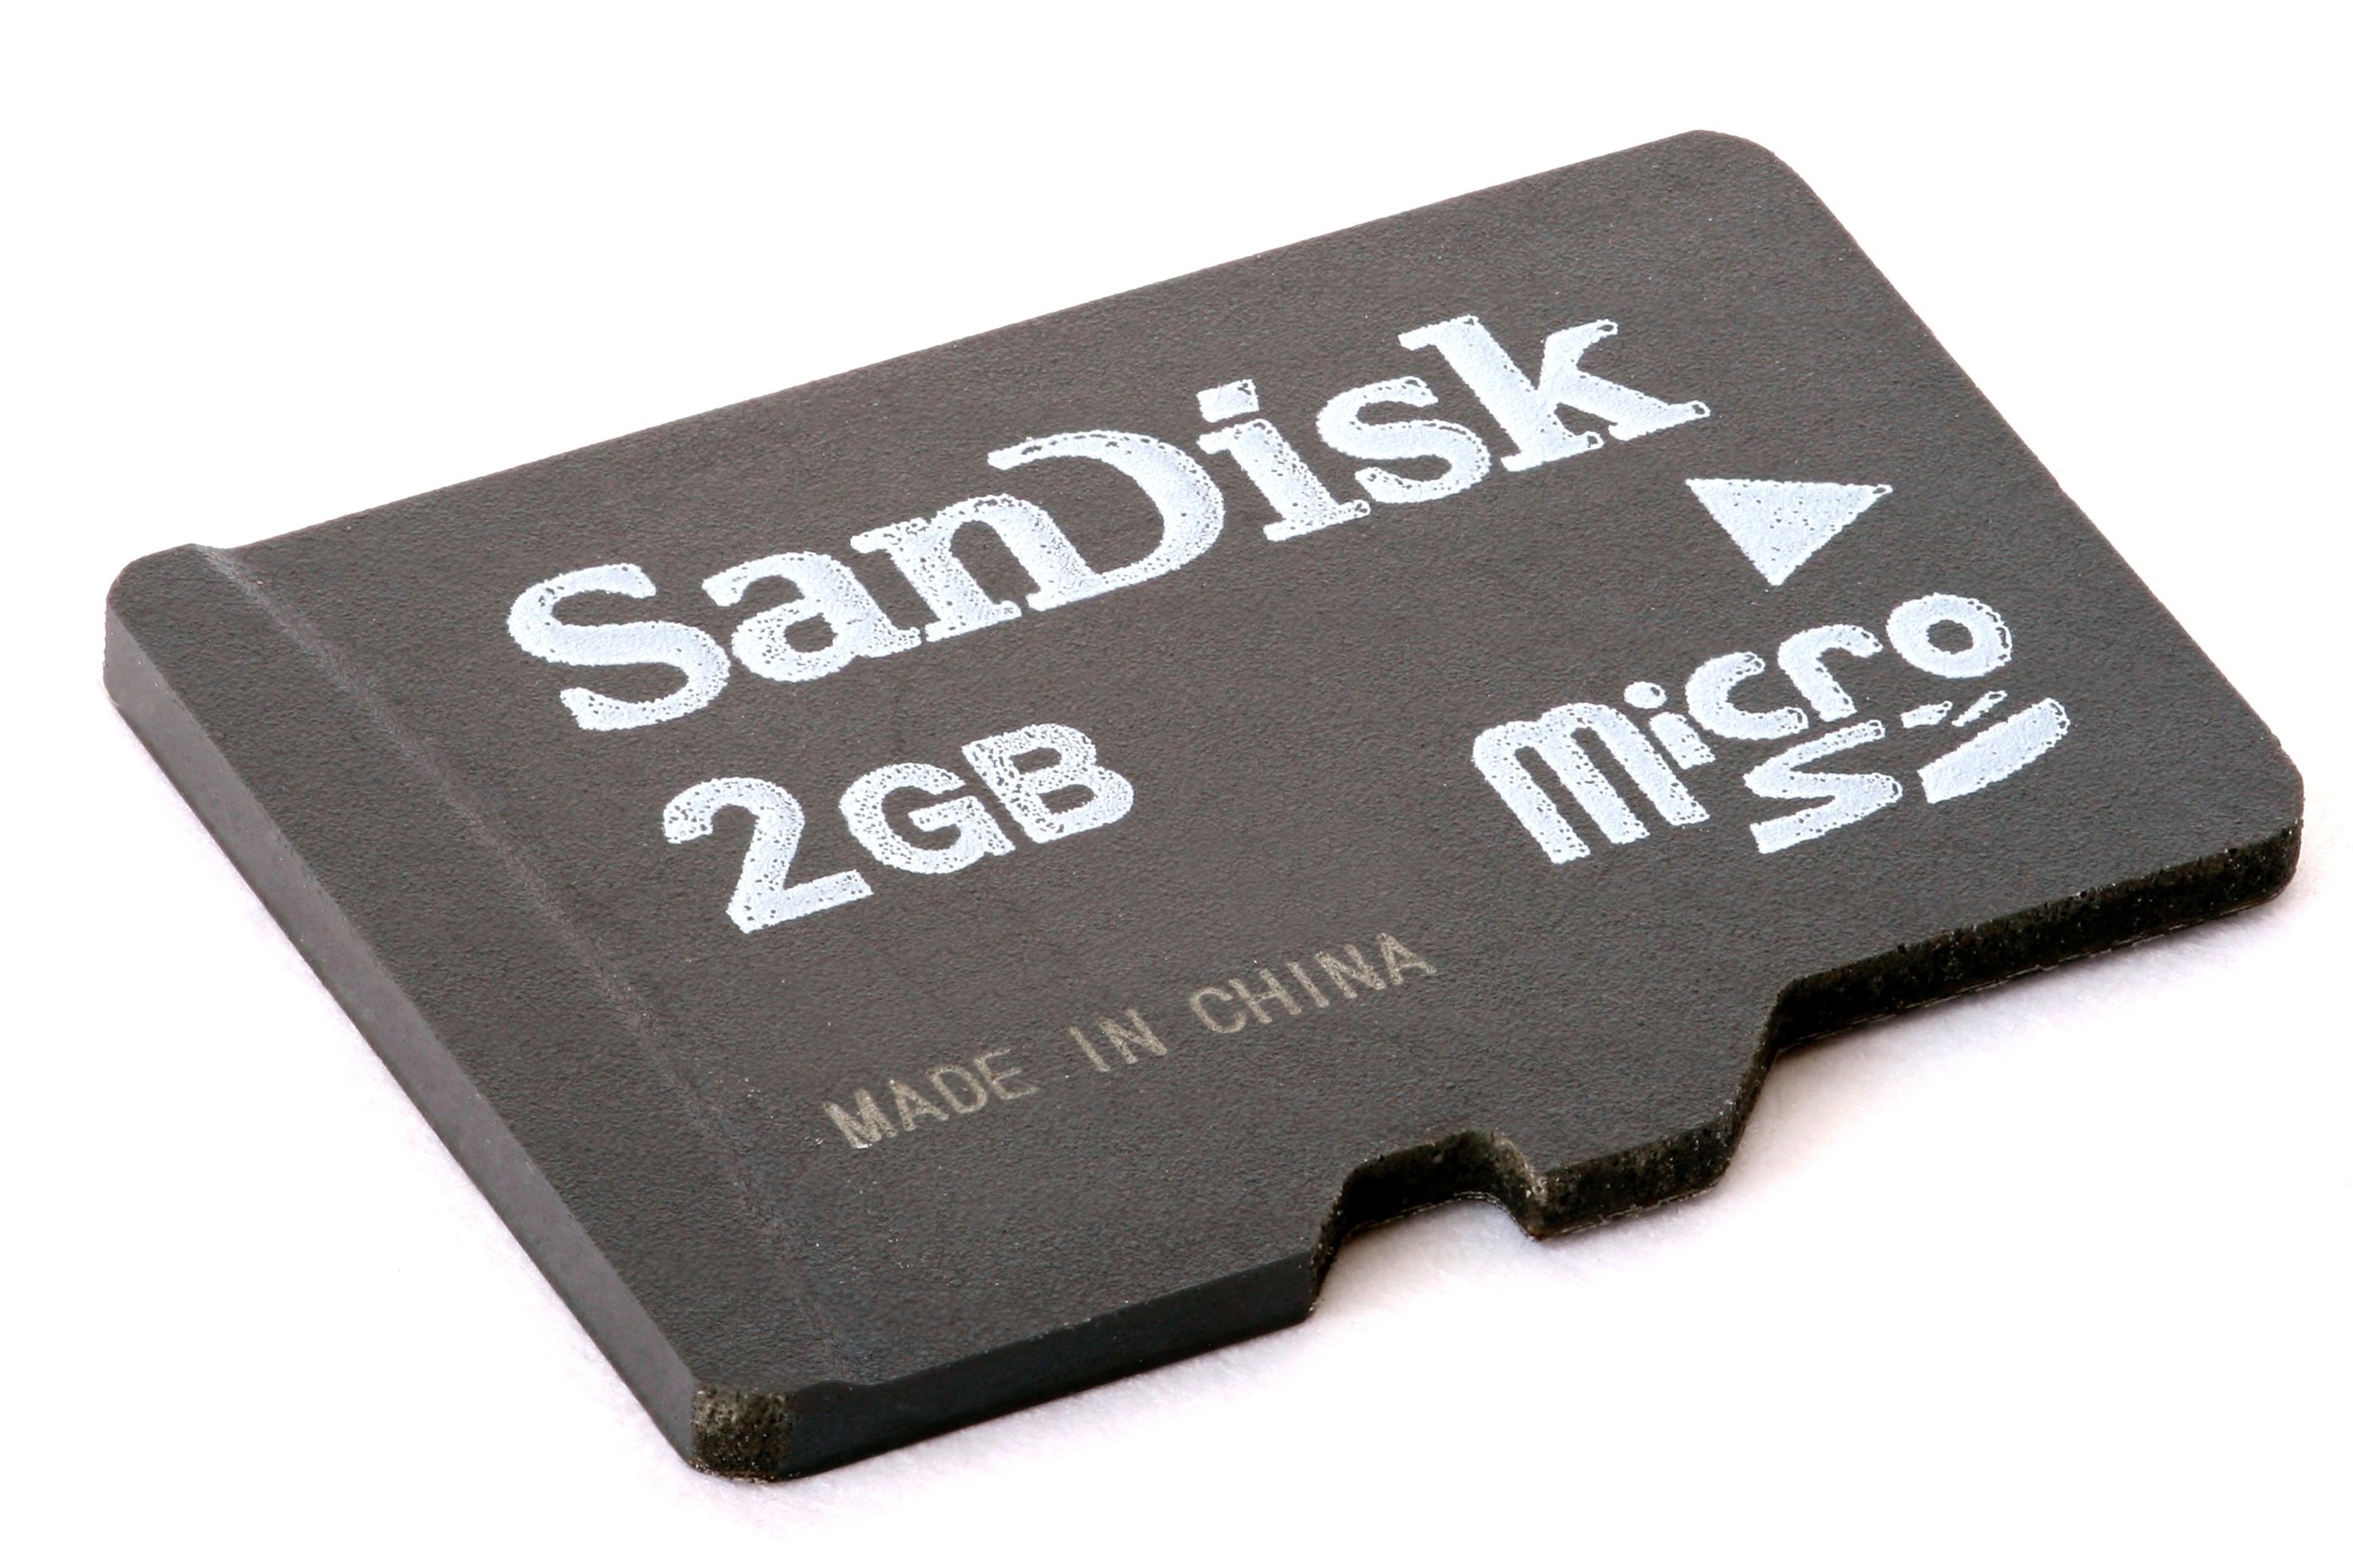
    Micro SD cards don’t cost much, but buying a fake one would cost you time. To save you from that frustration, I will share an easy process to spot a fake Micro SD card.

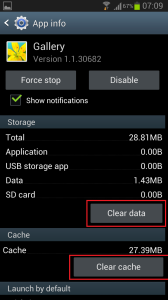
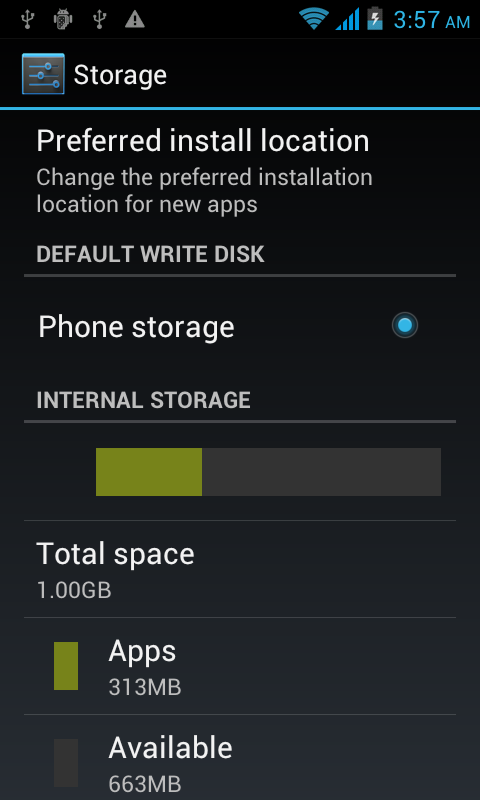
    If you can’t afford to buy a micro SD card, check out this post on how to free up storage on your android device.

    Never Buy Cheap Fake Micro SD Cards

    Of course, an original micro SD card costs more than the fake one. You first need to know that you should not purchase any cheap counterfeit micro SD card from an unknown vendor. Always buy from a reputable store, whether it’s online or offline.

    Before buying your Micro SD card, you should install SD Insight on your Android device. In my city, finding a legit micro SD card is difficult. I have also used this same method to test the SD card.

    Use SD Insight App to Spot a Fake Micro SD Card

    SD insight is a helpful and free app you can install on any Android device. It will display the SD card manufacturer information, model number, and the original capacity of an SD card. You have to insert an SD card into your android device and run this app.

    This information will help you spot a fake micro SD card right away.

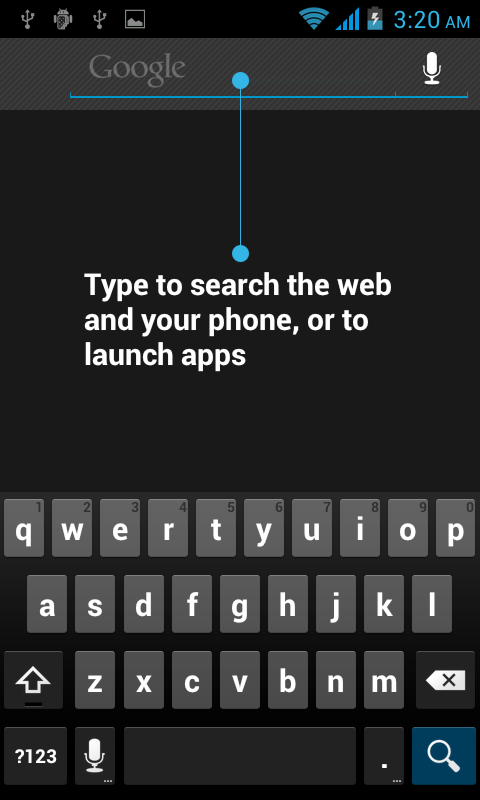
    Step 1: Download this app on your Android device by going to Google Play and typing ‘SD Insight’ in the search box.

    Step 2: Once installed on your device, you have to insert the micro SD card and run this application.

    Step 3: It will show you plenty of information about your device’s internal storage (MMC Card) and external SD card. Since we only want to test the external SD card, we will tap on the SD Card option from the top menu.

    Now you should check for these things manually.

    Manufacturer & Production Date

    Check both manufacturer information and the production date. Some SD card manufacturers don’t manufacture their chips, such as Kingston.

    However, it would help if you looked up the manufacturer’s name on Google. I bought the Kingston SD card, so when I saw the manufacturer information, it wasn’t mentioned Kingston in the manufacturer. So, when I look it up, I found that it is, in fact, a company that manufactures Kingston SD card chips.

    Model Number on Your Packaging

    You Should check the model number match the one mentioned on your SD card packaging. If it’s not, then you probably have a fake micro SD card.

    Card Capacity (Storage)

    In your SD Insight app, check that it mentions the card’s correct capacity. For instance, if you have purchased a 64 GB SD card, it should clearly say that.

    There are several other methods to spot a fake micro SD card, but for them, you need a laptop. I hope you find this post helpful. Let me know in the comments what other methods can be used to spot a fake SD card.

  • How to Easily Free Up Storage on Your Android Device?

    How to Easily Free Up Storage on Your Android Device?

    If you constantly run out of space on your android device, you should check out these simple tips to free up more storage on your Android phone.

    The simple solution is to buy a new Micro SD card to increase the storage on your device. However, for some reason, if you can’t buy a new SD card, here are some valuable tips to free up storage.

    First of all, you should check how much storage has been used by your apps and media files from settings > storage.

    remove cached data

    You can use that storage option to remove some unimportant files, media, and apps. Also, you can try out these methods to get more space on your device.

    Remove Cached Data from Apps

    One of the most annoying thing about Android is that it caches a lot of data in apps such as YouTube, Instagram, Facebook, etc… Caching that data help Android applications load faster. That’s why we see a lot of apps hog storage and memory.

    You can find an option to clear Cached data from Settings > Storage > Cached Data. Tap OK when it asks for confirmation.

    This will free up much storage on your device (depending on the device’s usage).

    Backup Your Photos to Cloud or PC

    If you take a lot of selfies and photographs from your phone, you should back up your photos somewhere safe. You can use cloud storage such as Dropbox, Google Drive, or Google photos. You can also save them on your laptop.

    After backing up your photos, you can remove them from your device storage. I use Google Photos, which handles this pretty seamlessly. It comes with both options; if you want to keep the quality of your photos, then you should consider buying more storage from Google. https://one.google.com/storage

    Remove Unused Apps

    Are there any apps on your Android phone which you never use? I had some apps I installed for some reason, but then I forgot about them.

    You can find apps you don’t use and uninstall them immediately. It will save you a couple of hundreds of Mbs on your device storage.

    Use Files from Google

    It is a new Android app by Google to help you manage files and keep your device storage healthy. It has several options to choose from. When you first run this application, it will scan unnecessary files and folders and give you a chance to remove those junk files and free up more space on the device.

    Also, if you give Google Files permission, it can track which apps you don’t use and give you a notification to uninstall those unused apps.
    https://play.google.com/store/apps/details?id=com.google.android.apps.nbu.files&hl=en

    Buy an SD Card

    So, if you are one of those who keep all their media files on an Android device, you must buy an SD card. I recently purchased a 128 GB SD card because I had a lot of media files on my device.

    Whichever SD card you buy, always buy it from a reputable vendor. There are a lot of fake SD card manufacturers, so you should be wary of them. Please read my article on how to spot a fake micro SD card before buying one.

    Use Cloud Storage

    If you save a lot of files on your device, you can sync all of them to your cloud storage. Using cloud storage is the easiest way to keep your device free from unnecessary data.

    Google gives 15 gigs of free cloud storage with every account, so you might as well use it. When you find a good use for that space, you can always buy more storage from Google.

    Similarly, you can try Dropbox. It is another cloud storage option to choose from. It comes with a free account; you can upgrade it to get more storage.

    I hope you find this post helpful. Let me know in the comments what other methods you use to free up Android device storage.

  • Download Songs from SoundCloud to Your Android Phone

    Download Songs from SoundCloud to Your Android Phone

    Are you looking for a way to download songs from your SoundCloud app to your Android phone? The good news is, you can download any song on your mobile phone memory.

    SoundCloud is an online audio distribution platform and music sharing website based in Berlin, Germany that enables its users to upload, promote, and share audio. There are many mainstream artists as well as some underground musicians who upload their music on this website.

    How to Download Tracks from Soundcloud (Official method)

    On Web, you can download tracks once you have signed in to your SoundCloud account by clicking on the download file button beneath the waveform:

    You can enable, or disable downloads for your listeners through your track’s Permissions tab. Enabling downloads means that your listener can have a copy of your original file format that you have uploaded to SoundCloud.

    Please note: Not all tracks are downloadable. If you don’t see a download file button, it means the user who uploaded it did not intend for it to be downloadable. Additionally, only individual tracks can be downloaded and playlists as a whole are not available.

    Saving content on mobile devices

    Music disk

    It is not possible to download a track from a mobile device. However, users with a SoundCloud Go or Go+ subscription can save content for offline listening on a mobile device.

    Disclaimer: This tutorial is for educational purposes only. If you like the song and want to download the then please support the artist and buy the song from SoundCloud, Spotify or Google Play store.

    How to Download Songs from SoundCloud Android App to Your Phone Memory?

    Step 1: if you don’t have SoundCloud app on your Android phone, then first download SoundCloud app. Register your account on SoundCloud.

    Step 2: Now, download SoundLoader app from PlayStore. It is an amazing app, which make downloading songs from SoundCloud easier for the end user.

    Step 3: Go to your SoundCloud app, and search for your favorite song that you want to save in your phone memory. You will find a 3 vertical dot icon at the bottom of the screen.

    Download songs from SoundCloud

    Step 4: Clicking on it will open up a new menu. From there, tap on Share button.

    Share a song from SoundCloud

    Step 5: Find the app icon SoundLoader from the sharing options. When you click on it, this will start downloading your favorite song to your phone memory. You can use this amazing feature to download as many songs as you want.

    Websites to Download SoundCloud Music

    These are third party websites which can be used to download a song from Soundcloud to any device. You need to copy a URL of the track that you want to download and paste it on the website.

    Android Apps to Download Songs from SoundCloud

    • My Cloud Player: SoundCloud player with ChromeCast, Upnp/Dlna and Last.fm support.
    • SoundHound: Hey, what song is that? SoundHound 8 makes it simple to discover music playing around you. Whether you’re in the car or out and about, open the app, hit the big orange SoundHound button, let your phone listen for a few seconds, and we’ll tell you exactly what’s playing! Some folks have called it pure magic, and we tend to agree.
    • Hound voice: Want to try something more advanced? Hound can use follow-up questions and commands to filter, sort, or add more information to the original request. Give this a shot: “OK Hound… Find Asian restaurants rated 4 stars or more within walking distance of Times Square and exclude Chinese, Korean, and Thai”

    You can also share this article with your friends to let them know this cool way to download songs from SoundCloud to your Android phone for free. However, please keep that in mind downloading copyrighted stuff is illegal in some countries and it could cause you some serious trouble.

  • Gallery Lag Fix for Samsung Galaxy S3 GT-I9300

    Gallery Lag Fix for Samsung Galaxy S3 GT-I9300

    Samsung Galaxy SIII (GT-I9300) is my first ever Samsung device, I am using Android OS for a year or so but had not bought any Samsung device before. I am now stuck with the beauty of Touchwiz for now. I have rooted my phone for changing ROMs but I didn’t like any other custom ROM. In my personal opinion, Samsung TouchWiz ROM is perfect for this device.

    Still time to time, I face some problems with this device, like I have noticed the heavy lag in the Jellybean gallery app. It made the scrolling a bit choppier. I tried this lag fix by my own and fixed that heavy lag issue in the gallery app. You don’t need any third party application to apply this lag fix. You just need to stop the Picasa and Facebook photo syncing from the settings. Also, you need to delete the old data & cache from the gallery and SNS app. Here is a complete noob friendly guide:

    Important Note: By applying this lag fix you will lose your Facebook and Picasa synchronized photos, and data from the gallery app. I would highly recommend to backup all of your photos and data to Dropbox or on your computer.

    Gallery Lag Fix

    • First of all, backup all your device photos to the computer by plugging your device via USB cable.
    • Go to settings, under account first tap on the facebook. Now click on the username with the sync icon.
    • Settings Samsung S3Uncheck Sync Gallery and move back to settings.
    • Un Sync Gallery
    • Now, select Google under the Accounts. Tap on the email address with sync icon, uncheck these boxes Sync Google Photos and Sync Picasa Web Albums.
    • Move back to settings, open Application Manager. Now go to last tab “ALL” in the application manager.
    • Find the Gallery App there, tap on it. Now Clear Cache and Clear Data.
    • Samsung Galaxy S3 Gallery Lag
    • Move back to the Application Manager, in ALL tab find the app SNS. Clear cache and data of this app as well.
    • Now, restart your phone. Wait for 1 or 2 minutes to fully load the Operating system. Now open the gallery app if it’s still showing the same lag as before let me know.

    Note: After rebooting the phone, the gallery needs to re-build the cache again. It may lag once or twice. But when you use it for some time it will not lag as it was lagging while the syncing was enabled. Let me know in the comments if this lag fix has worked for you.

    If you’re having difficulty charging up your Galaxy s3 then read this post on how to fix slow charging on Galaxy S3.

  • Slow Charging Fix for Samsung galaxy S3 GT-I9300

    Slow Charging Fix for Samsung galaxy S3 GT-I9300

    Update:
    09 November – 2013

    The old tutorial worked for me for a day or two then this slow charging issue came back. However, I resolved the slow charging issue on my Galaxy SIII (GT-I9300) by changing the USB cable. This slow charging fix is working on lots of other Samsung devices as well. It turns out the stock Samsung cable was faulty.  It was not sending current to the device as it supposed to be. I used the HTC desire USB cable and this resolved my issue completely. Now, my device getting the charging current as it should get. On AC  the charging current should be 1000ma and on USB it should send 460 to the device.

    Slow Charging

    Slow Charging Fix

    • Download this app from the xda thread or buy it from the play store.
    • Connect your charger to the wall socket and turn on the switch.
    • Now, open the installed galaxy current app and check out the max values. It must show  1000 in max value.

    If not try some other cable with your charger and repeat the above process. When you get the 1000ma on max value, it means now your slow charging issue has been fixed and it is charging properly.

    ———————————————————————————————————————–

    Out Dated:
    The procedure given below didn’t work for me either in long run. Please use the above-updated tutorial for solving your charging issue.

    I bought the Samsung Galaxy S3 (GT-I9300) about a month ago, it is my first high-end device. After using this device a couple of weeks, I upgraded my phone to this official firmware update I9300XXEMD3.

    After the new update, I encountered this strange problem on my phone. It was charging quite slowly on the stock wall charger. I even tried USB charging via my laptop but it was not getting completely recharged.

    For hours of searching on the internet, I finally found the fix. I am not sure if this fix will solve the slow charging problem on any other firmware but for me, it worked though. For those of you who are having this problem, give this solution a try and let me know the results.

    Note for Rooted users:
    This fix has only been tested by me on the stock firmware I9300XXEMD3 and on stock android recovery. I don’t know if this fix will work on rooted devices as well but you can try it by wiping the cache in CWM/TW recoveries. But I would recommend asking some expert on XDA before taking any actions.

    Things you need:

    • A working unrooted GT-I9300 with stock Firmware and recovery.
    • Save your important data on the computer, just in case if you accidentally delete the complete system so you can recover back your important data.

    For Backup of your phone data, please read this:

    If you want to back up your applications and apps data without root, you can use the Helium backup app from Google Play.

    After creating the app backup, copy all the important data from internal/external SD card via plugging your device with your computer and paste it to someplace safe on your computer’s hard drive.

    Note: You will not need this data, but just to be safe you should back up all of the important data.

    Solution:

    1. Turn off your phone and wait for 5-10 seconds.
    2. Now press the volume up button + Home Button and power button at the same time. Leave the buttons when you see the green Android Logo. This button combination will send you to the Android stock recovery.
    3. Please note this interface of stock recovery cannot be controlled through a touch interface. For going up/down use the volume keys and for applying an action from the recovery use the power button.
    4. Now, carefully select the option “Wipe Cache Partition”. By using the volume down button to scroll to the wipe cache partition and apply your action by pressing the power button.
    5. Wait for few seconds to complete this operation, now carefully select the option “Reboot System Now”.
    6. This will restart your phone to the main Android OS.
    7. Now, wait for few more minutes to settle down the OS. In this time find your wall stock charger and plug your device for charging.

    Let me know if this fix will resolve your issue of slow charging. Also, check out my other post on Samsung Galaxy S3 gallery lag fix.

  • Qmobile Noir A8 New ICS ROM ported from MyPhone A878

    Qmobile Noir A8 New ICS ROM ported from MyPhone A878


    Important Note:

    Please flash this rom at your own risk. I am not responsible for any damage caused by flashing this rom. If you are still want to flash it, go ahead and do it. Don’t claim me if your device got bricked by flashing this rom.

    Download ROM

    All credit goes to origional developer of this rom. I just did some copy pasting from changing boot.img and some other little tweaks. I am no expert, programmer or claiming anything. I give credit and respect the real developers of this rom. If you have any claim or want to delete this thread please feel free to PM me.

    Features of ROM:

    Quote:
    1. 2.5 GB internal Storage, now you can choose where you want to install your apps.
    2. Super fast & more responsive
    3. T9 Stock ICS dialer
    4. Stock ICS messaging app
    5. screen lock/unlock sounds changed
    6. More battery efficient
    7. New launcher
    8. Some new ringtones and notification tones

    This ROM is not quite different from Qmobile Noir A8 ROM but the speed of the ROM is what makes me think to share this rom with other people. Please feel free to leave your comments if you find any bugs. I cannot guarantee you I will solve your problem but I will try to find solution for your problem. (because I am noob like many of you guys).

    Not working: 

    Quote:
    FM radio
    Please let me know if you face any other problem.

    Installation:

    First of all, for installing this ROM on your Qmobile Noir A8; you must root your device and install CWM recovery. (there are many tutorials on XDA, please Google it)

    1. Download ROM from here.
    2. Copy the zip file to root of your SD card.
    3. Turn off your phone, Now wait for few seconds to complete shut down.
    4. Press Power + volume down button on the right corner of your phone. It will take you to CWM recovery interface.
    5. Backup your current ROM. (for navigation use volume up and down keys and press power button to enter) Click on Backup and restore > Now click on Backup. wait for 10 – 20 minutes for completely backup your rom.
    6. Now, you have backup of your old working rom, just in case anything goes rom between flashing this rom you can restore your backup.
    7. Now click on Wipe data/factory reset.
    8. Click on wipe cache partition.
    9. Go to mounts and storage and > format /system.
    10. Click on advanced > Wipe Dalvik Cache.
    11. Now click on Install zip from SDcard > Choose zip from sdcard > Select the rom name ICS_Qmobile_NoirA8.zip
    12. It will flash the rom to your device, wait for few minutes. After this process ends click on reboot system now.
    13. Have fun with this new ROM

    If you find any bugs or other suggestions please let me know.

    Credit:
    Djwayne Orgional developer of this rom
    Pakistanish for PAQ1 ROM, using his boot.img and other related tweaks to apply on this rom