If you see this error on your Windows PC, GFXUI has stopped working then I have a fix to resolve this error.
I have been using windows 7 for a year but have never faced any problems. Yesterday, I deleted some unnecessary files from my computer to speed it up a little. I accidentally unchecked the .Net Framework from the settings in the control panel and forgot about it.
What is the .Net Framework?
The .NET Framework is required to run many applications on Windows. You can use the following instructions to install it. .NET is a programming framework created by Microsoft that developers can use to create applications more easily.
Most times, applications will ask for a particular version of the framework to be installed. We’d recommend avoiding installing that partcular version, and trying instead to install the most up-to-date version of .NET, assuming your Windows OS supports it. Most .NET packages have backwards compatibility, so an app asking for the 2.0 framework can usually get by with what’s packaged into the latest version: .NET Framework 4. Be sure, too, that you’re settled up on your Windows Update requests, as there may be relevant system patches that need installing before .NET will fit comfortably on your system.
After a while, when I turned on my computer, it displayed the message’ GFXUI has stopped working‘. I tried to resolve this problem with the help of different online tutorials, but none of them worked. Most Windows problems vanish when you restart the computer, so I tried restarting it, but it didn’t work.
I searched for solutions for a couple of hours, but there were different methods of solving this issue. I tried some of them, and finally, one of them worked. I thought this might also help people facing this problem on their Windows 7. I made a short tutorial on how to fix the ‘gfxui has stopped working‘ error in windows 7.
How to Fix GFXUI Has Stopped Working Error?
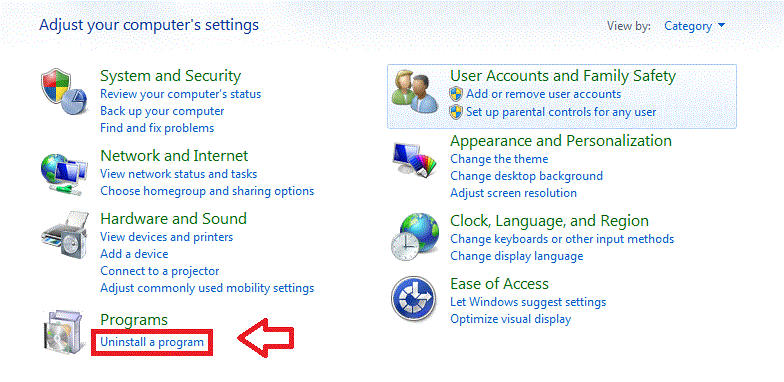
Go to Control Panel > under the programs > uninstall a program.
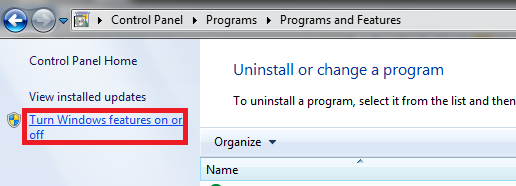
Now see at the left side >Turn windows feature on and off.
It might say, please wait. So wait a while.
Check the box Microsoft .Net framework; when you click on the checkbox, it will turn blue.
Press the ok button. Applying these settings again takes some time.
Restart your computer to ensure the GFXUI error will not pop up again.
I hope these settings will work for you. If you still see the GFXUI error message, uninstall the Microsoft .Net framework. Go to Control Panel> Uninstall program> Microsoft .Net framework.
Now, download the new update of.Net framework from the Microsoft website. I hope this error will be fixed. If you still cannot resolve the issue, please get in touch with Microsoft support.
It doesn’t matter how well you have maintained your PC, after a few months Windows will automatically start performing slower. It is because Windows stores a lot of temporary information in cookies, registry files and applications. It is recommended to do basic maintenance of your PC after every few months. Windows comes with software to clean your computer free of unwanted files but they will not completely clean your system.
That’s why I would recommend you to use these softwares to remove needless junk files from your Windows system.
Use The PC Decrapifier to Remove Junk Files from Windows
It’s a paid software, so, you can use it for free but with limited functionality. Here is how you can use it to best optimize your Windows system performance.
After the installation, when you run this program it will show you a Welcome screen. Read those quick instructions then click “Analyze” to start the process.
You can select programs and files that you think are not needed anymore. “The PC Decrapifier” uses recommendations driver by other user feedback system.
Review the selection of files and confirm your selections before removal.
It might take a couple of minutes to completely remove those files. When it is finished, you should restart your computer and notice the difference.
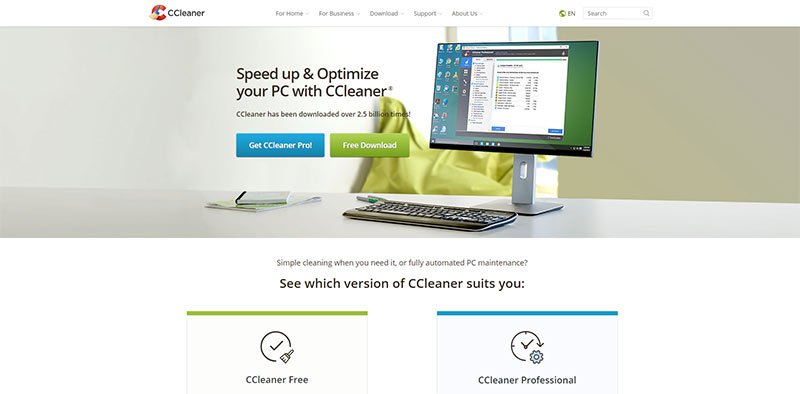
Delete Unnecessary Files from Windows using CCleaner
Ccleaner is one of the widely used, system optimization tool for computers running Windows. I have used CCleaner and found it really simple and easy. When I ran CCleaner on my computer for the first time, I was surprised to find out that there were 4 GB of unnecessary files on my computer. After removal of those files, my computer was faster than before.
Using CCleaner can improve the speed and performance of your computer. When we are talking about performance, most people rely on the hardware for speed and ignoring the fact that utilizing their usage of software can also affect the performance of their machine.
There are some features which I would like you to see first before download Ccleaner. CCleaner can delete these:
Internet Explorer Browser
Temporary Files
Browser’s Cache
URL History
Cookies stored in your browser
Hidden Index.dat files
Last downloaded file location
Firefox Browser
Temporary Files
Browser’s Cache
URL History
Cookies stored in your browser
Windows System Files
Files from Recycle Bin
Recent used Document files
Temporary files
System’s Log files
Clipboard items and history
DNS Cache
Error reporting files
Memory Dumps
Jump Lists
Registry Cleaner
Advanced features to remove unused and old entries, including File Extensions, ActiveX Controls, ClassIDs, ProgIDs, Uninstallers, SharedDLLs, Fonts, Help Files, Application Paths, Icons, Invalid Shortcuts and more..
You can download CCleaner from here. It is highly valuable software for your computer life. When you download complete run the downloaded setup file on your computer and install CCleaner on your computer.
After completion of software you need to see a minute or two for how to use CCleaner. It is not that hard, you just need to tick the files which you want to delete from your computer. That’s it, now run the setup and after few minutes it will delete all of unnecessary files from your computer.
There are also many other utility softwares for deleting unnecessary files but in my opinion CCleaner is really simple and fast. If you have suggestions about any other best utility software please feels free to suggest them using the comments below.
If you like this post then please feel free to share it.
Are you looking for useful Google Chrome extensions to improve your browsing experience? In this blog post, I am going to share with you 10 best and useful Google Chrome extensions that I personally use to check different things as a webmaster and a marketer. I think you will also find them useful.
If you don’t have it yet, I would personally recommend you to download it. I am sure after a few days you will start loving it. What I like most about Chrome, it is faster than any other web browser and it does not hang old computers when multiple tabs are opened. I found Chrome more user-friendly compared to other browsers.
Super-users of Mozilla Firefox might need some extensions to make their Chrome browser experience similar to what they had on Firefox. Extensions and add-ons make Chrome more efficient and useful so I would like to tell you about 10 useful Chrome extensions which I think you will find useful to enhance your browsing and social networking experience.
If your business demands you to check emails all the time, this is quite a useful extension. It will Display the number of unread messages in your Gmail inbox. You can also click the button to open your inbox.
It will update the number of unread emails in your email inbox as soon as new messages arrive. You can then reach your Gmail inbox by clicking on the Google Mail Checker button.
A fun extension for Google Chrome to watch YouTube videos by darkening all the background info. The entire page will be fading to dark, so you can watch the videos as if you were in the cinema.
With a single click on the lamp button, the page will fade to dark. And automatically focus on the video. By clicking on it again, the page will return to normal.
If you are into social marketing then this extension will help you to organize your social networks from 1 single dashboard. Publish updates, track activity, and analyze results across multiple social networks including Twitter and Facebook.
Try it free, and choose from three plans tailored to meet your needs. You just have to set the time and date in the future then it will get published automatically when the actual fixed time comes. The basic version of Hootsuite is free with limited functionality.
With help of sticky notes, you will be able to organize your to-do lists and reminders in one place. You don’t need any paper notes to put on your computer screen or computer desk.
All you need to do is install this extension and then take notes. It will save in your browser whenever you click on the sticky notes extension button a tab will open and you will be able to see your notes in only one tab of your Google Chrome browser. You can give different colors to different notes.
Increase your browsing speed by blocking unnecessary flash content. This extension saves your system resources so you can run multiple things at once. This extension is mostly useful for users with slow and outdated hardware to speed things up a little.
while you are browsing on an old computer. Flash Block extension will automatically detect flash files on the webpage and block them. You can also manage to allow websites (such as YouTube) via configuration panel by clicking on the extension button.
Note: In new Google Chrome versions, Google uses its built-in browser modules to display PDF and Docs files.
It automatically opens web document files and PDF files in Google Docs viewer. Installing this extension will help you to not download a file to view it on your computer. It will redirect you to Google Docs viewer. You can organize formats in the option panel of extension.
Stay Focused extension is helpful to boost productive times while you work on your computer. If you procrastinate a lot then you need this extension. I would highly recommend it.
You can restrict the websites which you think you are addictive of. When the restricted time has complete you can reach to the sites. Stay focused extension is a need for those who are suffering from social networking addictiveness and other entertainment websites and it is affecting their work.
There are lots of good informational website you have seen but their formatting and visual feel of the content is not visually pleasing to read. The Mercury Reader extension for Chrome removes ads and distractions, leaving only text and images for a clean and consistent reading view on every site.
Mercury extension will help you read those informational websites on the other tab. You just have to press the button of extension at the top of your Chrome browser. There are many features of this extension including sending a file to your Kindle, print and save it to read it later.
Deletes typed URLs, Cache, Cookies, your Download, and Browsing History…instantly, with just 1-click on the Eraser button! History Eraser is a lightweight and useful add-in designed for a more comfortable browsing experience.
History Eraser is easy to use. One of the best cleaning tools for your Chromebook, Windows PC, Mac or Linux.
Capture a screenshot of your current page in entirety and reliably—without requesting any extra permissions!
The simplest way to take a full page screenshot of your current browser window. Click on the extension icon (or press Alt+Shift+P), watch the extension capture each part of the page, and be transported to a new tab of your screenshot where you can download it as an image or PDF or even just drag it to your desktop.
These are not the only best Google Chrome extensions but most of them are really helpful. There are many more extensions on the Google Chrome web store; I tried to find some of the best extensions. Usually I don’t write long posts but the extensions and the abundance of them compelled me to write more. I am sure I have missed some useful extensions and add-ons. Please feel free to mention them in the comments.
If you are looking for a way to block ads in your Google Chrome browser then the good news is, you can do it quite simply. As a marketer myself, I understand that advertising is not harmful in any way to the end’s user. However, there are some annoying ads that we all want to to be disappeared.
If you use Google Docs then also check out best Google Docs tips to improve productivity.
In this post, I am going to share with you a simple process to block annoying ads from your Google Chrome browser.
Adblock Extension
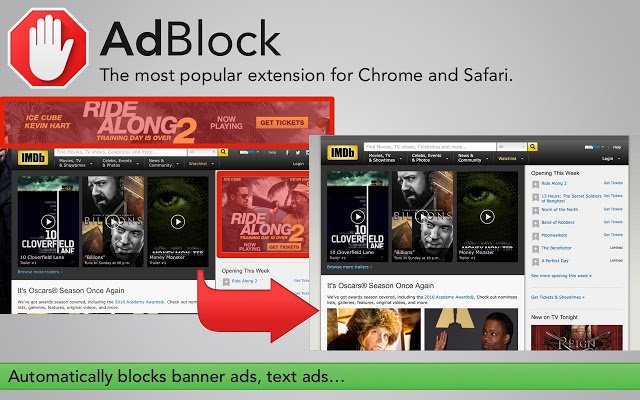
The most popular Chrome extension, with over 60 million users! Blocks ads all over the web.
AdBlock. The #1 ad blocker with over 200 million downloads. Blocks YouTube, Facebook, and ads everywhere else on the web.
The original AdBlock for Chrome works automatically. Choose to continue seeing unobtrusive ads, whitelist your favorite sites, or block all ads by default. Just click “Add to Chrome,” then visit your favorite website and see the ads disappear!
It is a Google Chrome extension which helps you to disappear ads from your Chrome browser. Adblock is useful for anyone who is tired of seeing irrelevant and annoying ads.
There are definitely more such extensions to block ads on Google chrome store but I personally like Adblock.
If you are using Firefox; you can find a similar extension for blocking ads in Firefox, search in Firefox extension store page or Google it adblock plus.
Adblock will block the ads from all of the websites including Facebook and YouTube. So let’s see how to install ad block extension.
How to Install Adblock Extension and Remove Ads
Update: This free app is supported by all modern web browsers now: Mozilla Firefox, Opera, and Safari across multiple devices. But in this guide, you will see the installation and configuration of the advertising blocker in the most popular browser at the moment – Google Chrome.
It will start downloading extension file to your computer, wait for a couple of seconds to finish the download process.
That’s pretty much it. You can access Adblock settings by clicking at the wrench icon at the top right corner. You will find a ‘Stop’ sign, clicking on it will open up a menu.
If you want to reconfigure your setting of ad blocker you can adjust it by click on the stop sign button.
Now you can browse the internet safely without seeing any annoying ads in your browser.
How to Uninstall Adblock Extension from Google Chrome?
If you don’t want to use adblock anymore then you can uninstall it whenever you want.
From the Chrome toolbar, click the Chrome menu icon, hover over More Tools and select Extensions.
It’s now incredibly easy to make a GIF from a Youtube video. You might want to capture some moments as a GIF from a YouTube video. Animated GIF is the best way to save time frame from the video and share it online. Because it’s really easy, it takes only a few seconds and it is fun to do.
In this guide, I will show you how to make a GIF from a YouTube video by using some simple online tools.
You can use any of these tools that you like, each tool does the job well. Also, they are quite easy to use, you can create GIFs within a few minutes.
What is a GIF File?
A GIF (with the file extension, .gif) is basically an image file format that is animated by combining several other images or frames into a single file. This single file is encoded as a graphics interchange format (better known as GIF). Unlike the JPEG image format (.jpg), GIFs typically use a compression algorithm referred to as LZW encoding that does not degrade the image quality and allows for easy storing of the file in bytes.
The multiple images within a single GIF file are displayed in succession to create an animated clip or a short movie. By default, animated GIFs display the sequence of images only once, stopping when the last image or frame is displayed, although it can also loop endlessly or stop after a few sequences.
You’re not limited to YouTube videos, either – you can create GIFs using clips from Vimeo, Facebook, DailyMotion, and pretty much any other video hosting site you can think of.
Before you start, however, bear in mind that using third-party apps to download videos is against YouTube’s terms of service. Downloading videos is also a potential copyright infringement unless you own the video yourself, have permission from the copyright holder, or it’s in the public domain.
There are many online tools available to make a gif image. In this tutorial, I am only going to mention some of them. You can choose any online tools from this list to create a free gif image from your favorite YouTube video.
Online Tools to Turn any YouTube Video into a GIF image
All of these tools are free to use and available online; we don’t need to download any extra software for downloading videos or making animated gif images.
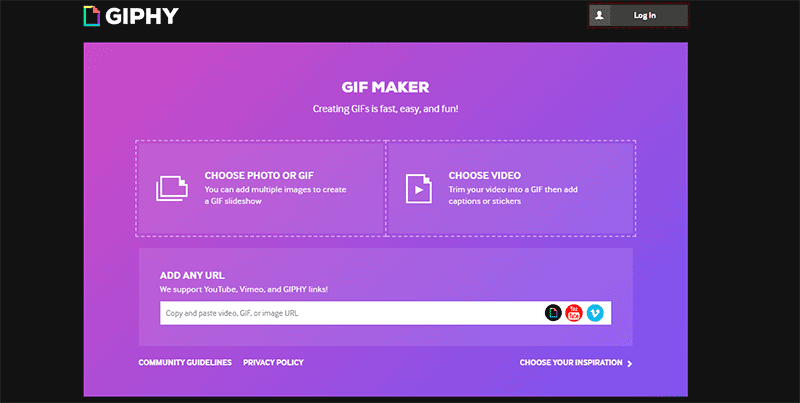
How to create GIF images from any YouTube Video
Paste a link from YouTube, Facebook, Vimeo, Dailymotion, or any other video websites. You can also select a funny video from your computer or phone gallery.
Trim the video and add a caption. Any of the above websites will then make a GIF and host it for free with a unique URL.
Share the GIF on Reddit, Facebook, Twitter, Tumblr, Pinterest, VK, or another site of your choice. You can also download and share via email or text message.
It doesn’t matter how you are saving your computer from virus and spyware.
There are still chances that your computer is needed a scan for virus. There are many things that can infect your computer with virus such as downloading files from the Internet, receiving files via instant messaging, Bluetooth, Portable devices, mobile phones, USB, and memory card reader.
Any external device connected with your computer might infect it with a virus. If you are feeling suspicious about your computer health then you should definitely run a scan on your computer.
In this tutorial, I am going to show you how to detect virus and spyware on your Windows 7, 8, or 10 OS computer. Please use the step by step method and let me know if you face any issue while following this tutorial.
Remember: The process of a full scan in windows defender program might take a long time. So, before running a full scan on your computer make sure that you have a couple of hours of free time.
What is a Computer Virus?
A computer virus is a type of malicious software that, when executed, replicates itself by modifying other computer programs and inserting its own code. When this replication succeeds, the affected areas are then said to be “infected” with a computer virus.
Turn on your computer, click on the start menu button at the left down corner of your desktop.
Now, in the search box type this ‘windows defender’.
When windows defender open, click on full scan.
Now, it will take around a few hours. So be patient and wait to finish it.
When the scan will complete windows defender will tell you how many harmful items it detected on your computer and ask you to clean it.
Click on clean system.
Another window will open and windows defender will ensure all the actions are applied completely.
Now your scan is complete. if the error or Trojan you think is still there on your computer after the scan then you should re-install Windows OS or restore previously backed up system image.
If you like this post and want to make sure your family and friends stay safe from virus and trojans, please consider sharing this post.