Tag: Google

  • How to Fix “Aw, Snap!” Error in Google Chrome?

    How to Fix “Aw, Snap!” Error in Google Chrome?

    The “Aw, Snap! Something Went Wrong” error is a frustrating issue encountered by many Google Chrome users.

    This error typically indicates a problem with the browser’s rendering engine or a conflict with extensions, plugins, or browser settings. In this guide, I will help you resolve the “Aw, Snap!” error and get Google Chrome back to working condition.

    Reload the Page

    Sometimes, the “Aw, Snap!” error occurs due to temporary network issues or a glitch while loading a webpage.

    Simply click on the reload button or press Ctrl + R (Cmd + R on Mac) Chrome Shortcut to refresh the page and see if the error persists.

    Check Internet Connection

    One of the common reasons for encountering the “Aw, Snap! Something Went Wrong” error in Google Chrome is an unstable or interrupted internet connection.

    Make sure that your device has a stable and functioning internet connection is crucial for loading pages correctly.

    • Start by verifying that your device is connected to the internet. Look for the Wi-Fi or cellular data indicator on your device’s status bar to confirm the connection status.
    • Alternatively, try accessing other online services or websites to check if your internet connection is working properly.
    • If you’re using Wi-Fi, make sure you’re within range of your router and that the signal strength is adequate. Consider restarting your router or modem to resolve any potential connectivity issues.
    • If you’re using a cellular data connection, ensure that mobile data is enabled on your device and that you have sufficient signal strength. You may need to move to an area with better network coverage if the signal is weak or unstable.
    • If you’re using a public Wi-Fi network, such as in a coffee shop or airport, ensure that you’ve successfully connected to the network and accepted any terms of service or login requirements.
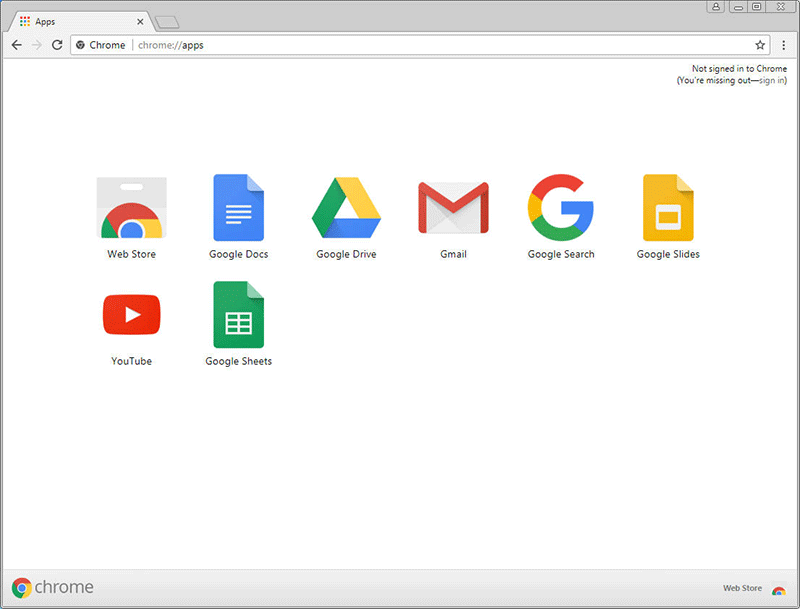
    Disable Extensions

    • Extensions such as Ad Blockers can sometimes conflict with Chrome’s rendering engine and cause the “Aw, Snap!” error.
    • Open Chrome and go to chrome://extensions/.
    • Disable all extensions by toggling the switch next to each extension to the off position.
    • Reload the webpage and see if the error is resolved. If so, re-enable extensions one by one to identify the problematic one.

    Clear Browsing Data

    Cached files and cookies may sometimes interfere with Chrome’s functionality, leading to the “Aw, Snap!” error.

    • Go to Chrome settings by typing chrome://settings/ in the address bar.
    • Scroll down and click on “Advanced” to expand advanced settings.
      Under “Privacy and security,” click on Clear browsing data.
    • Select the time range and the types of data you want to clear (e.g., cookies, cached images and files) and click Clear data.

    Update Chrome

    • Outdated versions of Chrome may contain bugs or security vulnerabilities that can trigger the “Aw, Snap!” error.
    • Check for Chrome updates by clicking on the three-dot menu icon > Help > About Google Chrome.
    • Chrome will automatically check for updates and install them if available. Restart the browser after updating.

    Reset Chrome Settings

    Resetting Chrome settings to their default values can help resolve underlying configuration issues causing the error.

    • Go to Chrome settings by typing chrome://settings/ in the address bar.
    • Scroll down and click on “Advanced” to expand advanced settings.
    • Scroll down to the “Reset and clean up” section and click on Restore settings to their original defaults.
    • Click Reset settings to confirm and restart Chrome.

    If none of the above methods work, reinstalling Chrome can often resolve persistent issues.

    Uninstall Chrome from your computer through the Control Panel or Settings app. Download the latest version of Chrome from the official website and install it.

  • 10+ Best Google Docs Tips to Increase Productivity

    10+ Best Google Docs Tips to Increase Productivity

    If you are new to Google Docs or having trouble using it, this post will help you a lot. In this post, I am going to share with you the best Google Docs hacks and tips to boost productivity.

    1. Must Know Google Docs Keyboard Shortcuts

    Using keyboard shortcuts will improve your productivity while working on a Google Docs. These shortcut are the most important ones which are used frequently.

    • Ctrl+Home: Get back to the top of your doc.
    • Ctrl+B: Bold text.
    • Ctrl+E: Align center
    • Ctrl+L: Align left.
    • Ctrl+M: Insert a comment.
    • Ctrl+H: Replace text.
    • Ctrl+Z: Undo.
    • Ctrl+Y: Redo.
    • Ctrl+J: Full justify.
    • Ctrl+Shift+L: Bulleted list.
    • Ctrl+Shift+Space: Insert non-breaking space.
    • Page Down: Move down one screen.
    • Ctrl+K: Inset link.
    • Ctrl+Shift+F: Full screen.
    • Page Up: Move up one screen.
    • Ctrl+Space: Remove formatting.
    • Ctrl+: Heading style 1. Change the “1” to any number 1-6 and get the corresponding header.

    You are not limited to only use these keyboard shortcuts only. In fact, you can add your own keyboard shortcuts.

    Create a new document or open an existing document, then select Tools > Preferences.

    Select Automatic Substitution if it’s not already enabled.

    On the left, you’ll find replacement fields you can use to enter the phrase you wish to use as the shortcut. Enter the text you want to replace in the field on the right.

    2. Export Documents to Your Computer

    When you’re done editing, you can save and export the document as a Word file (go to “File,” then “Download as” and select Word doc or your desired format). This works in Sheets (Excel) and Slides (PowerPoint) as well.

    3.Use Made up Templates

    If you are writing a CV or a cover letter or anything similar, you might need templates to make things easier.

    Check out Google’s template library to find templates from project proposals to schedules, invoices, calendars, and business letters.

    You can also create and save your special templates to be used for the future.

    4. You Can Type by Using Your Voice

    You can create and edit documents through Google Docs using only your voice. Before you begin, you must make sure voice typing is open.

    In your Google document, select Tools.

    Select Voice Typing to open the voice window. It will open on the left-hand side of your document screen.

    You’ll need to allow Google Docs to access your microphone if this is your first time. Once approved, you’ll be able to start speaking immediately.

    As you speak, Google will transpose your words into your document.

    To add punctuation to your document, simply say the punctuation you wish to add. For example, say “period” to add a period to the end of a sentence.

    You can also add new paragraphs by saying “new paragraph” or “new line” while speaking into your document.

    To edit your document, say “italics” or “bold” to enhance words within your sentences. You can also say, “go to the end of the line” to skip ahead.

    5. Use Google Keep within Google Docs

    You can also add notes and images from your Google keep without even leaving the Google Docs. Work with Google Keep notes right from Google Docs. You can add a text or image note from Keep to a document. And likewise, you can add a note to Keep using content from a document.

    6. Add New Fonts

    When you create a new document, Google Docs starts you off with nearly two dozen native fonts you can choose from using the dropdown list on your top editing toolbar. But, there are dozens more fonts and typefaces available to you in that same dropdown.

    To add additional Google Doc fonts, open your document and click the fonts dropdown third box from the left on your editing toolbar.

    7. Open a New Document from Your Browser’s Address Bar

    Simply open a new Chrome tab and type “doc.new” and hit return, and you’ve got yourself a new blank Google doc. Amazing, right? It’s the kind of simple trick that will leave you surprised, impressed and kind of annoyed you didn’t know it already.

    8. Tag People Using Comments

    There’s an option of adding a comment by highlighting some text. For example, if want to point out mistakes of your writer to the editor then you can tag them by highlighting the text that needs to be overlooked. Google Docs will notify the tagged user through an email the text of your comment.

    9. Add Table of Contents

    If you’re writing a long essay or a book then this feature will be quite useful. Without adjusting anything, You can simply press the table of contents button and it will generate and stylize content according to subsections and headings that you have used in the document.

    From the menu click on the ‘Insert’ then choose ‘Table of Contents’.

    10. Publish Docs to the Web

    If you can’t afford to have a domain name and web hosting then you can publish your document as a webpage. Here’s how you can publish a Google Doc as a webpage.

    • In Google Drive, open your file.
    • From select File > Publish to the web.
    • Click Publish.
    • Copy the link and send it to anyone you’d like to share the file with.
    • Updates you make to the original file go live when you re-publish it.

    I hope you like this post. Let me know in the comments your favorite Google keyboard shortcuts or productivity hacks.

  • How to Use Google Search Operators to Make Your Google Search more Powerful

    How to Use Google Search Operators to Make Your Google Search more Powerful

    Google search operators are really helpful for anyone searching for something on Google.  Search engines made the Internet browsing experience easier and comfortable for an average user. Imagine if there were no search engines at your disposal. How’d you find those cool websites?

    There are many search engines but the one widely used is Google. So, in this post, I will only discuss the search operators related to Google.

    If you use Google Docs then check out these cool Google Docs hacks to improve your productivity.

    What are Google Search Operators?

    Some people find difficult to use Google search when they are trying to find something, for those people Google made search operators, with the help of search operators anyone can easily find more accurate results.

    For instance; I am as a student many times use this search operator option whenever I need to find educational articles or help on the internet.

    Inurl:.edu ‘Discrete Mathematic logic’.

    This search operator will only include the results from .edu (education) websites. This search operator is really helpful for me when I get stuck. There are different search operators to find more specific results.

    In this post, I will tell you some of those search operators and tips to search less and find more. When we are stuck in the middle of a work no one wants to spend time on searching again and again.

    Here I have made the list of the search operators which will help you to search more in less time.

    Allintitle:
    We use this search operator to find the keywords from the title of the webpage. For instance allintitle: Tutorials and tips. Now this will only include the results with the title of ‘Tutorials and tips’.

    Define: 
    This one is a useful operator to find definitions of the unknown words. Like Define: Alexander. It will tell you who the person was and you can also try many other words to find definition.

    Movie: 
    This search operator is used for finding movie information. Like, [movie: Tom Hanks talking to volleyball]. Now, this search query will take you to the pages Tom Hanks movie Castaway.

    Weather
    We use this operator to find weather to any specific city. For instance ‘Weather New York’. The weather forecast of New York will appear at the top of the results.

    Flight Search
    You can search the flight schedule of the city and also find by flight number. Flight New York, this search operator will let you find next flights from New York to other destinations. If you include your flight number against flight, it will tell you the exact time of the flight. Find the status of a flight by just simply write down the flight number Emirates 601. It will tell you the departure and arrival time.

    Google search website

    Recent Search Operators

    Since I have written this post, Google has introduced a lot of new search operators. Also, Google now understands queries intent from a user and show different search results to different users. For example, if you search for your flight status by entering your flight number on Google, it will display the exact time of departure and arrival of your flight.

    I hope you found this post useful. Let me know in the comments if you have any suggestions.

  • How to Display Only Favicon Icons in a Bookmark Bar on Google Chrome

    How to Display Only Favicon Icons in a Bookmark Bar on Google Chrome

    You can show only favicon icons of a website to your bookmark bar on Google Chrome using this simple trick. You can customize the look of your bookmarks.

    Using bookmark bar is a good way to manage frequently visit sites in Google Chrome browser.

    Also, check out these useful Google Chrome keyboard shortcuts to browse faster.

    What is a Favicon Icon?

    A favicon is a file containing one or more small icons, associated with a particular website or web page.

    A web designer can create such an icon and upload it to a website (or web page) by several means, and graphical web browsers will then make use of it. Browsers that provide favicon support typically display a page’s favicon in the browser’s address bar.

    Source

    In this tutorial, I am going to show you how you can manage bookmark bar to add more bookmarks in it.  We will edit bookmarks to show only favicon icons in bookmark bar, one more benefit of using favicons in bookmark bar is; you can add more bookmarks using less of space on your browser.

    If you are using Google Docs then check out these productive Google Docs hacks.

    How to Add a Bookmark to Your Google Chrome Browser

    • On your computer, open Chrome.
    • Go to the site you want to visit again in the future.
    • To the right of the address bar, click Star Star.
    • Find a bookmark
    • On your computer, open Chrome.
    • At the top right, click More More and then Bookmarks.
    • Find and click a bookmark.

    To open bookmarks faster, use the bookmarks bar. Your bookmarks will show under the address bar. Click a bookmark to open it. To turn the bookmarks bar on or off, click More More and then Bookmarks and then Show Bookmarks Bar.

    • Open your Chrome Browser, go to Wrench Icon > Bookmarks > Bookmark manager.
    • Now, if you already have bookmarks in your bookmark manager, you can click down arrow > Edit > delete the bookmark text.

    Show Favicon Icons in Bookmark Bar using Google Chrome extension

    You can also use IO bookmark extension to do this without editing the text in your bookmarks. You have to install this extension in your browser and click at the button of IO on the left side of Wrench icon in your Chrome browser. It will automatically show only favicon icons in your bookmark bar.

    If you want to hide the bookmark bar from your Chrome browser, simply press Ctrl + shift + B. it will hide your bookmark bar. If you want to unhide it simply press again the combination of keys Ctrl + Shift + B.  You can do it as many times you want.

    I am sure you find these tips useful for your Chrome browsing experience. If you want to make your chrome browser experience more cool then see this post ten cool extensions for your chrome browser. If you have any suggestions and comments regarding Chrome please feel free to comment. I reply to every useful comment on the topic but make sure your comment is related to the topic.

  • Block Ads in Google Chrome using Ad Block Extension

    Block Ads in Google Chrome using Ad Block Extension

    If you are looking for a way to block ads in your Google Chrome browser then the good news is, you can do it quite simply. As a marketer myself, I understand that advertising is not harmful in any way to the end’s user. However, there are some annoying ads that we all want to to be disappeared.

    If you use Google Docs then also check out best Google Docs tips to improve productivity.

    In this post, I am going to share with you a simple process to block annoying ads from your Google Chrome browser.

    Adblock Extension

    The most popular Chrome extension, with over 60 million users! Blocks ads all over the web.
    AdBlock. The #1 ad blocker with over 200 million downloads. Blocks YouTube, Facebook, and ads everywhere else on the web.

    The original AdBlock for Chrome works automatically. Choose to continue seeing unobtrusive ads, whitelist your favorite sites, or block all ads by default. Just click “Add to Chrome,” then visit your favorite website and see the ads disappear!

    It is a Google Chrome extension which helps you to disappear ads from your Chrome browser. Adblock is useful for anyone who is tired of seeing irrelevant and annoying ads.

    There are definitely more such extensions to block ads on Google chrome store but I personally like Adblock.

    If you are using Firefox; you can find a similar extension for blocking ads in Firefox, search in Firefox extension store page or Google it adblock plus

    Adblock will block the ads from all of the websites including Facebook and YouTube. So let’s see how to install ad block extension.

    How to Install Adblock Extension and Remove Ads

    Update: This free app is supported by all modern web browsers now: Mozilla Firefox, Opera, and Safari across multiple devices. But in this guide, you will see the installation and configuration of the advertising blocker in the most popular browser at the moment – Google Chrome.

    • Go to ad block extension page.
    • Click on the button ‘add to chrome’.
    • How to install ad block extension in google chrome browser

    • It will start downloading extension file to your computer, wait for a couple of seconds to finish the download process.

    That’s pretty much it. You can access Adblock settings by clicking at the wrench icon at the top right corner. You will find a ‘Stop’ sign, clicking on it will open up a menu.

    If you want to reconfigure your setting of ad blocker you can adjust it by click on the stop sign button.

    Now you can browse the internet safely without seeing any annoying ads in your browser.

    How to Uninstall Adblock Extension from Google Chrome?

    If you don’t want to use adblock anymore then you can uninstall it whenever you want.

    • From the Chrome toolbar, click the Chrome menu icon, hover over More Tools and select Extensions.
    • The Extensions tab opens.
    • Locate Adblock Plus and click Remove.
    • A dialog box opens.
    • Click Remove.
    • Close the tab.

    Google Chrome is a fast browser but if you want to browse even faster then check out these useful Google Chrome keyboard shortcuts.

    If you find any difficulty while installing ad block extension, feel free to ask in the comment box below.

  • How to convert Youtube videos into Mp3 format

    How to convert Youtube videos into Mp3 format

    Sometimes you are listing to a song on YouTube and you wish if it could be possible to download this song and keep it into your phone storage so you would listen to it whenever you want.

    It seems like a difficult idea to download a 3gp or mp4 format video from YouTube into mp3 format but believe me it is simple.

    There are many websites and online tools which you can use to download Youtube videos into mp3. Here are some of them:

    Best Websites to Convert YouTube Videos into MP3 Format

    You can easily convert and download YouTube-clips to mp3 in high-quality by using these websites. And here is the best part – you can do it on any device you have and you can do it absolutely for free.

    1. Convert YouTube songs into MP3 Using Online Video Converter

    1. Copy and paste the video link that you want to convert.
    2. Select “.mp3” in the format field.
    3. Click the “Start” button to initiate the conversion.
    4. When the conversion is done, download the file from the link provided.

    FEATURES

    Fully compatible with the latest web browsers
    Super fast conversions
    No registration necessary
    Supports links from most video websites
    No limitations on conversions and downloads
    No software download or installation needed

    2. Convert YouTube Songs into MP3 Using YTMP3

    1. Copy A YouTube video URL from your browser’s address bar.
    2. Paste it into the search box.
    3. choose a format and click the convert button.
    4. As soon as the conversion is finished you can download the file by clicking on the download button.

    By using YTMP3 converter you can easily convert YouTube videos to mp3 (audio) or mp4 (video) files and download them for free – this service works for PC, tablets, and mobile devices.

    3. Convert YouTube Songs into MP3 Using Convert2MP3

    1. search for a video on YouTube, Dailymotion, Clipfish or on this website.
    2. Copy the link of the video and paste it in the search box.
    3. Select a format and convert and download it.

    4. Convert YouTube Songs into MP3 Using YouTubNow

    Providing a fast and free downloader YouTube to MP3 that can be used directly in the browser, YouTubNow makes it very facile for you to download your favorite videos.

    1. If you have the YouTube URL, simply paste it in YouTubNow. Otherwise, you can enter the name of the video and then click “Search”.
    2. You get a list of results and you get to choose the one you need.
    3. After identifying the video you want to convert, just select the quality and format of the final file and then click “Download”.

    Unlimited Downloads
    Faster Downloads Modifying the YouTube URL
    YouTube to MP3 Converter
    Type Video Name to Find Videos
    YouTube to MP4 Converter
    Choose Your Preferred Format
    No Registration Needed
    Compatible with All Popular Browsers

    5. Convert YouTube Songs into MP3 Using FLVTO

    The basic principle behind this service is the same for all formats and for all operating systems: just paste a link to a video that you want to be transformed to mp3 and download the transformed file a few moments later. It works on every OS or device you use!

    1. Copy a link to a video from YouTube
    2. Paste that link into an Input Field at FLVTO converter website
    3. Select the format you want
    4. Press “Convert to” and wait for your mp3 track!

    Do you use sound to listen to the latest music? If yes then check out this tutorial to download songs from SoundCloud.